Packing an espresso machine for shipment requires a box that is large enough to accommodate the machine, and the packing materials that will keep it safe. I use a variety of materials, including bubble wrap, plastic bags, and sheet Styrofoam (which can be purchased at your local building supply), tape, and good, strong, boxes. Peanuts, crumpled paper, or bubble wrap alone is not recommended - the packing material needs to be somewhat firm, and shock absorbent! Crumpled paper is not resilient - it crushes, compresses, and will not absorb shocks. Bubble wrap pops, and peanuts shift under weight - you need the packing materials to absorb shocks, and STAY PUT, not allowing your machine to shift over to one side, or the other.
The retail purchase of packing materials can be costly, but it's less costly than to pack poorly, with inadequate materials, have the machine arrive damaged, and the damage claim refused because of inadequate packing - spend the money for good materials, they are worth it, and so is your machine!
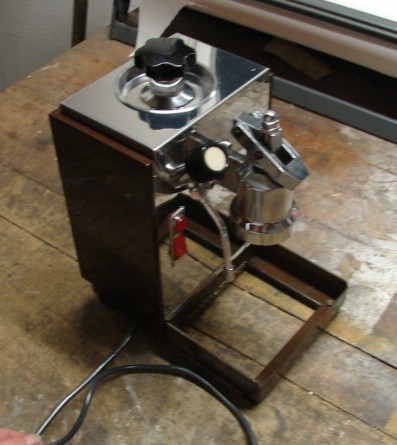
The example used here is an Olympia Cremina, but the same principles apply to any machine: Protect the parts, don't allow anything loose to bang around loose inside the box!
If the lever can be removed (often unscrewed from the machine), remove it. Take all loose parts, wrap them separately in bubble wrap, or foam wrap, wrap the cord so it can't rub against the machine:


If you were sending small parts, such as a portafilter, or baskets, these should be bubble wrapped separately, and placed with the cord, under the group - your goal is to create as square a profile as you can, with no loose parts rattling around in the box during shipment.

I place the machine into a plastic bag, sometimes two, just in case there is any residual water from the boiler that may leak out - you want to be sure that the cardboard of the boxes you use, stays dry!

Tape the plastic bag closed, then wrap the machine with bubble wrap - several layers of small, is better than only one layer of large! I wrap the machine first with bubble wrap around bottom to top, then wrap bubble wrap around the sides, securing the bubble wrap with tape (don't tape the bubble wrap to the machine itself - that would be bad for the finish!) No need to coat the entire cube with tape, just enough to secure it in place. You want to end up with a nice, firm, cube of a machine when you're done!


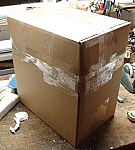
Measure the size of the cube you've created, and choose a box at LEAST 2" larger - 3" or 4" is better, and double boxing the machine is even better than that. UPS packing guidelines require at least 2" of packing materials, but we don't want damage, we want safe arrival, so more, is always better (and remember, if damaged, and a claim is made, the carrier will take the machine if they pay the claim - the point is to AVOID damage!)

Tape the bottom of your box securely, then cut styrofoam sheeting to fit the bottom of the box - at least 2" is required, 3" or 4" is better, layers of styrofoam work fine! Place the machine on the styrofoam in the box. Fill the sides, between the machine, and the sides of the box with styrofoam.


Once the sides are filled, and even all around, cut a piece of styrofoam to fit the top of the machine.

Now, Cut one piece of styrofoam to fit, overall - over the top of all of the packing materials.

For this example, I used box that is not tall enough all by itself, so I used another box, of the same size, to create the top 'lid' of the box. You can either cut the box 'top' to size, or leave it whole, using the sides to create a double layer of cardboard (good extra protection).


Be sure to include your address inside the box, just in case the label gets ruined, or separated! Tape the box closed securely, and the machine is packed & ready to ship!

Please keep in mind - shipping companies do not like to pay claims. We've shipped hundreds of machines over the years, and have found that getting the shipping companies to understand that a vintage machine doesn't HAVE the original packaging, that they are expensive (far more costly than the Mr. Coffee that they think should be the replacement value), that you can't just go pick one up off the shelf at your local department store, is nearly impossible. Even with insurance for full replacement value (a Cremina at full replacement value - $3,000.00), and well packed, they will NOT pay the claim. They will take your money to insure, but they will not pay it out. When you pay them to insure, you are insuring them against YOUR CLAIM - NOT you against their damage! So, PACK WELL - the very BEST insurance is good packing!